Saturday, December 26, 2015

Pop Art Style Onomatopoeia Bulletin Board


I've been sharing some of my bulletin boards lately. Here's the small hallway board that displays the  Pop Art style onomatopoeia paintings that the 4th graders made. 


Here's another look. Just trying to get the best light. But it ain't easy in this hallway!!!

You can find some other bulletin board examples in this post.

Thursday, December 24, 2015

Onomatopoeia- Elementary Style


If you follow this blog (and if you do, I sooooo appreciate you stopping by!!!), you know, that I like teaching onomatopoeia in the art class. You can check out my middle school take on it here. Well, I found out that onomatopoeia is now part of the new 4th grade ELA curriculum. Well, time to brush off my onomatopoeia lesson! Integrate it with with ELA  and modified it for the 4th graders.


We started off watching a Keynote about Roy Lichtenstein and his Pop Art Style of art. The kids learned that it is:

* Comic book influenced
* Has bold, flat color
* Has thick, black lines
* And uses Ben Day dots

Then we discussed what onomotopeia is. Since the kids had already started writing poetry using onomatopoeia in ELA class, our discussion went well. The kids had a lot to say about it! Woo Hoo for cross curricular lessons!

Went it came time for the kids to come up with what onomotopeia word they would use for their painting, I had three conditions or options. There onomotopeia had to be either a sound effect from nature (volcano exploding, a strong wind, an earthquake), an animal sound (a snake hiss, an owl hooting, a lion roar) or an action sound (something falling, something crashing down, etc). There are many styles of onomatopoeia, but I just picked these three to help the kids limit the sounds to be used. Sometimes it can be too overwhelming if there are too many options.

The following are works in progress.


The following are finished paintings. We used tempera paint and black, fine line sharpies for these.


What do you think of our onomotopeia paintings? Have you ever modified a lesson for a different grade level? You can comment below.


Tuesday, December 22, 2015

Ceremonial Elephants- Integrating With ELA


Are you always looking to find ways to integrate your art lessons with ELA?  I'm guessing your answer is 'Yes!'

Well, here's one lesson that we did, that went along with a 2nd grade literacy unit. Ceremonial elephants from India!

We start off watching a Keynote on the background of the Ceremonial Elephants of Kerala, Indian. The kids get an overview of Lord Ganesh, the mahouts who train the elephants and what goes on during the ceremonial march to the Temple by the elephants. 

The Keynote also has images that gives the kids a good look at all the decorative designs that go onto the elephants- the embroidered blanket, the bells and tassels, the painted flowers and toenails, jeweled necklaces and bracelets. Looking at the images of the decorations gave the kids a lot of ideas when it came to designing their own elephants.


This lesson took about three 45 minute art classes. The kids start off by picking two pieces of colored paper for the framed background. After that they used a piece of grey colored paper to make the elephant which is centered onto the background.


Next the kids get to pick a piece of scrap booking paper to be used for the blanket. They can trim it, then glue it to the elephant's back. After this the fun begins! On to the decorating!!

From there the kids can choose scraps  that are cut into shapes to make patterns that are glued around the frame. They can also use markers to start drawing necklaces, bracelets, tassels and other various patterns and decorations on the elephants. As you can see you get a lot of interpretations of the decorative patterns! Woo Hoo!

We also used some donated plastic jewels that we glued on for some extra bling!

What do you think of our Ceremonial Elephants? Would this be a lessons you could integrate with ELA? You can leave a remark in the comments below. 


Saturday, December 19, 2015

Wayne Thiebaud Inspired Lollipops


Wayne Thiebaud's art is really fun to introduce to kindergartners. Who doesn't get excited when they see sweets? You know cakes, pies, donuts! But for this lesson the kids got to take a look at his lollipop paintings for inspiration. Then... when they found out we were going to use clay. Oh boy! Talk about excitement!


I started out demonstrating how to make clay coils. (FYI- we used Crayola Air Dry clay) Or if you want to be really descriptive with your words, we were making a snake-like shape with the clay. One little tip- Just make sure to keep repeating that when you roll the clay into the snake-like coils to use the palm of your hand, not the fingers. That way, the coils come out rounder.

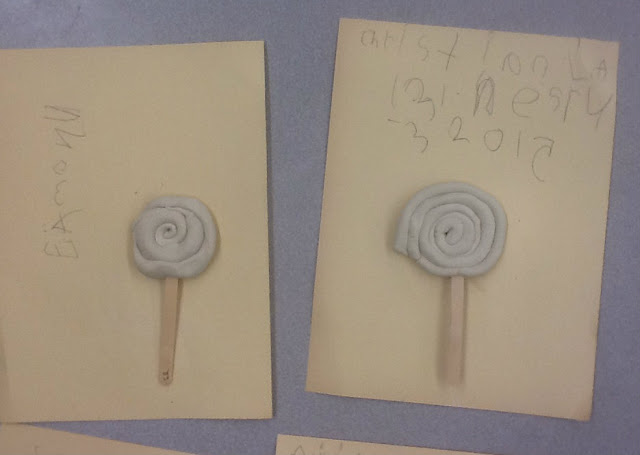
After the kids roll out the coils they then have to twirl them into a spiral. Remind them to start making the center first. The kids are excited to see that it's not as hard as they think to make the spiral!

Hint! Hint! Next comes the hardest part! 

The kids (or with your help) can turn the clay spiral over and  score the coils on the back with a clay tool. Explain to them this will help keep the coils together as it dries. Just keep repeating though, if you press too hard with the tool, you will break the coils!


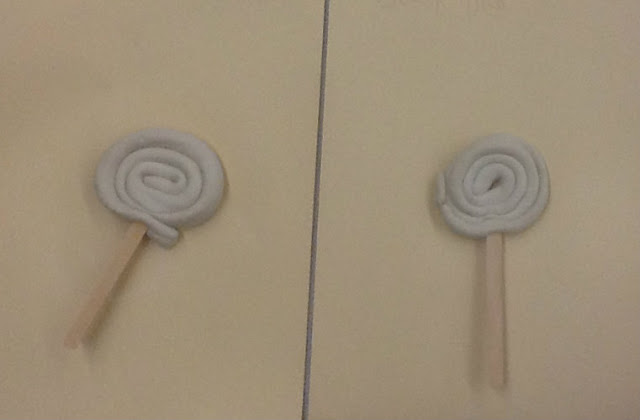
When the coil spiral is all set and done, you can then gently put a Popsicle stick into the clay for the kids. Then let them dry!

The next day when the lollipops were dry, I put some white glue at the base,  where the Popsicle stick entered the clay. Extra reinforcement! 

You'll be ready to paint during the next class!


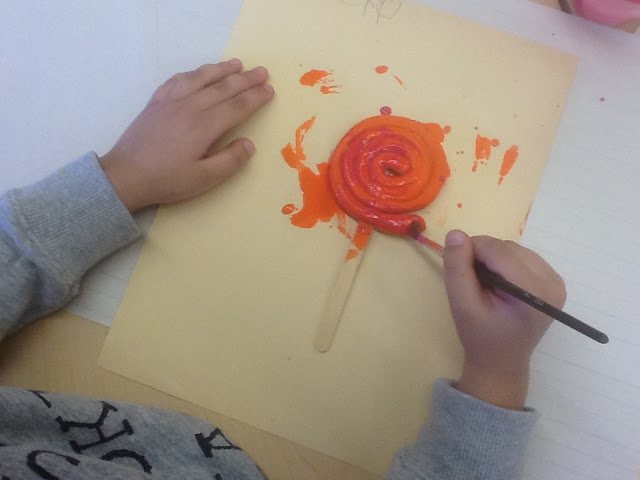
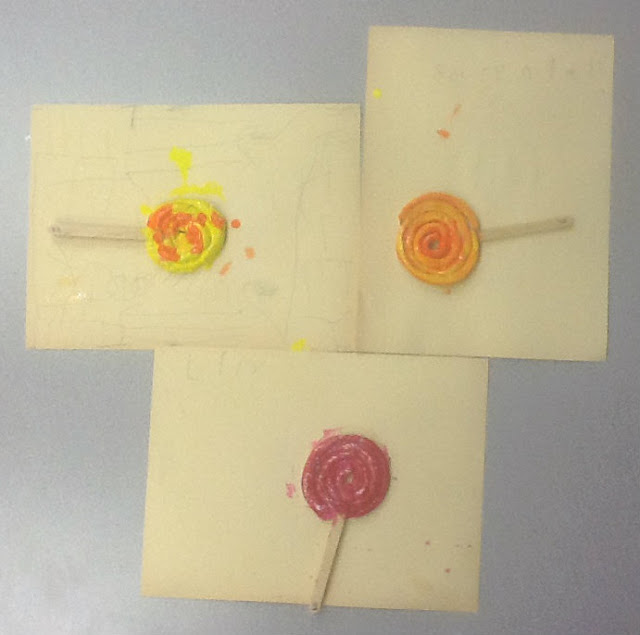
When it came to painting, I had 5 paint stations set up. They could choose two colors that they wanted to paint with.

Another hint- I always remind the kids to treat the paintbrush the way you treat your hair. No banging on the table, no twisting and no whipping it around. This analogy works for the most part.


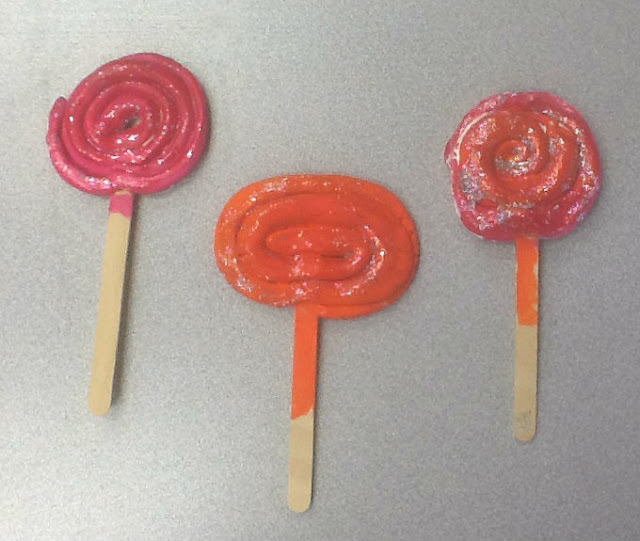
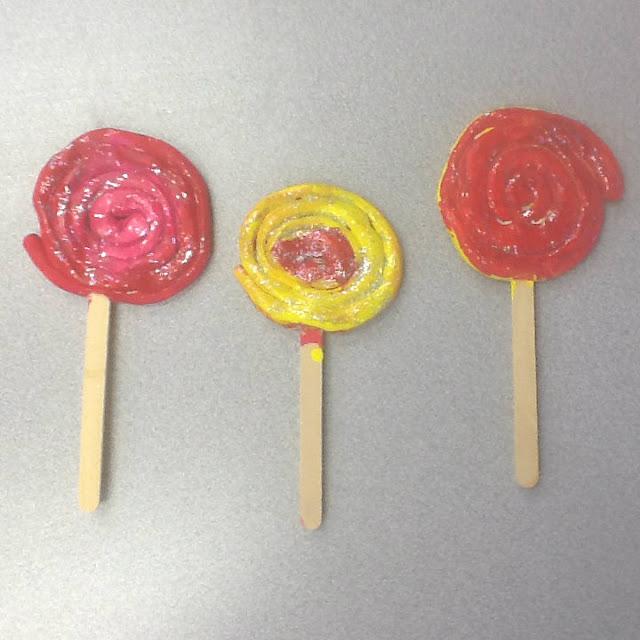
After the paint dried, I had two fifth graders help me put glitter on the lollipops. Again, another night  was needed for the glitter to dry.


And they're all done!

I was concerned that the lollipops would break on the way home. So they were each put in a brown, paper bag with their name on it, for the journey home. 

The lollipop came out really cute. They learned some art history. Got to paint. And had an introduction to clay coil making. Yeah! A win-win all around. You can't beat that!!

Well, what do you think? How about another Wayne Thiebaud inspired art lesson? You can find one here.

 Would these Wayne Thiebaud inspired lollipops work in your art class? Let me know! You can leave a comment below.


Sunday, November 22, 2015

Salvador Dali Bulletin Board

Every once and a while I like to share how the kids art work is displayed.

Here's a look at the bulletin board that displays the 1st graders' Salvador Dali portraits.  It's kinda simple, but it really works.


Here are a few more bulletin boards you can
 check out.


What do you think of the Salvador Dali bulletin board? You can comment below.


Monday, November 16, 2015

Salvador Dali Portraits


Do you want to add some art history into your 1st grade curriculum? Here's a lesson on portrait making, that adds some Salvador Dali and Surrealism into the mix. Not a bad combo.

This lesson starts out with a Keynote that features of few of Dali's paintings. The Persistence of Memory, The Elephants- to name a few. We discuss Surrealism, imagination and the effect that dreams had on the Surrealistic art movement while looking at the slides of his art work. The kids also got to share some of the "Surrealistic' dreams they've had in the past. 

We then took a look of some photos of Dali in a variety if eccentric poses and discussed what a portrait is. Which, of course, led to a discussion about his mustache. We also took note that he wore a black suit in a lot of the photos.

Next come the portraits! We drew them on manila paper, colored them in with crayons and cut them out. They were mounted onto various colored paper backgrounds. They then got a piece of black construction paper, folded it in half and drew a half mustache using  an organic, curvy shape.


Here are a few more of the finished portraits! 
Take a look.


If you want to see how the portraits are displayed you can check out this post here.


What do you think of our Salvador Dali portraits? Would they work in your art class? You can comment below.


Saturday, October 31, 2015

A Scarecrow Bulletin Board To Display Art Work


Hey, just wanted to share with you the scarecrow bulletin board that displays some of the 'three tricks for creating depth' pumpkin patches.

Here it is...  Cute, simple and ties in with the kids art work nicely. Hope you like it!!


How do you display your students' artwork. I'd love to hear about some of your bulletin boards ideas. You can comment below.

Saturday, October 17, 2015

How To Promote Your Art Class On 'Meet The Teachers' Night


Do you need some kind of handout to give parents on Meet The Teachers Night? You know, the kind that explains what... it exactly is... that we do in  art class.

Well, here is mine. It's always available to give to that parent (or parents) who stops by for a chat. 


So, why is this important, you may ask?

Here's two reasons why!

#1. It's a way to promote your art program.

#2. And, it's a way to give credibility to your program. It shows, that yes... we actually have art standards and...teach important skills in art class!

I hope something like this would be useful in promoting your art class.


Do you have a handout you give parents on Meet The Teachers Night? I'd love to hear about it. You can comment below.

Saturday, October 10, 2015

Three Tricks For Creating Depth In A Drawing

Educreations is a great app you can use to create tutorials for your students. It's one of my favorites. And the kids like it too. Especially when they are learning a new drawing skill. They can even watch it more than once if they want.


I wanted to share with you one way to use Educreations with this pumpkin patch drawing lesson for my third graders. The tutorial is all about showing the kids 3 easy, tricks they can do to create depth. 


What are the three tricks? Well, you'll have to watch the tutorial below!  But I'll give you a hint- one of the tricks is diagonal lines.


Take a look!

3 Tricks For Creating Depth In A Drawing

If you want to learn more about Educreations you can read more about it in this previous post- How To Make A Video Tutorial. Maybe you'll be inspired to make your own tutorials.

Do you an app or program to create tutorials. I'd love to hear about it. You can comment below.

Tuesday, October 6, 2015

How To Keep Track Of Erasers


Do you want an easy way to keep track of erasers? This is the simple way I kept track of my erasers when I taught middle school art.  


How about using an ice tray that's color coded?

In the tray, there would be three erasers for the red group, the blue group, the green group and the yellow group. The color coding helps to keep track of which group was using an eraser.

When some one in the blue group needed an eraser, they took one of the blue dotted erasers. When they were done they put it back to the blue color coded spot.

When the class was cleaning up at the end of the period, it was easy to glance over to see if all the erasers were put back in their proper spot.

Pretty simple, huh!

Would this work for your art class? How do you keep track of erasers? It would be great if you could share your eraser tips below.

Sunday, October 4, 2015

Celebrating International Dot Day


Do you want to help your students conquer their doubts and trust in their own abilities.  Do you want to help your students on their journey of self discovery?

I hope you said 'yes' to all above. Then, please, read on.

How about challenging them to 'Make Your Mark And See Where It Takes You'.


That is the theme of Peter Reynolds's popular book The Dot. One small dot on a piece of paper helps one little girl on her journey to see the potential of her creativity. (Oh, yeah!) And now, that little girl is inspiring children all around the world to be brave enough to create and make their own dot. (Double, oh yeah!)

After reading the book and watching The Dot youtube video, my students were inspired and challenged to 'Make Their Mark.'


For my 2nd graders "Dot Day' project we used a 6 X 6 piece of black paper for the background and multi colored scraps for the dots. The kids were then challenged to make dots in their own style.

And here's what they came up with.


How about you? Have you inspired your students to 'Make Your Mark'? If you've done a Dot Day project in art class, I'd love to hear about it. You can comment below.