 |
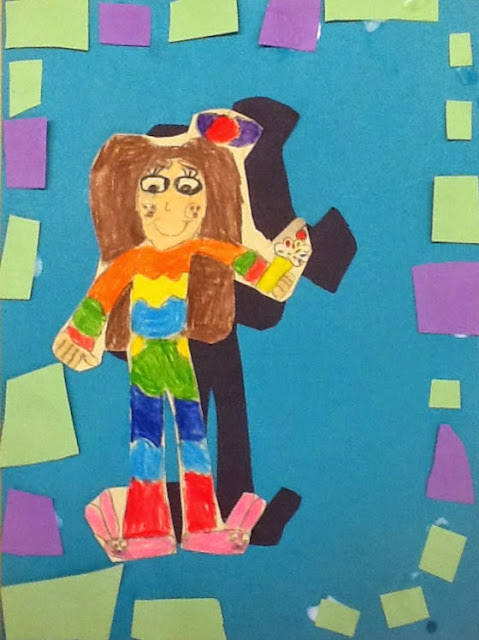
| Portrait with bunny slippers and an ice cream cone. |
Next, they can then move on to drawing in the chest, arms, neck and head. Put in facial features. And design their hair style.
Along the way they are reminded of basic tips when you're drawing people. The head is wider that the neck. Boy shoulders are generally wider than girl shoulders, etc.
The one thing that is required of the kid's portrait is to have symbol in their hand that reflects them. It could be a symbol of a hobby they like, a sport they participate in, a career they want to pursue when they're older. As you can see in the samples, they come up with a lot of different ideas- flowers, baseballs, food, etc.
And they can add more than one symbol. Which many do! As you can see on one of the above portraits with bunny slippers and an ice cream cone.
The hardest part of the lesson is cutting out the shadow and the portrait. (Teacher alert!!!) They have to cut the peach colored portrait paper (they can color is brown/tan for darker colored skin) and the black construction paper for the shadow at the same time. This can be difficult for some.
After they put the two papers together, they cut around the body in an 'egg' shape. That way they get rid of the excess paper that can trip them up when they're cutting the more intricate parts. You can see how I marked the cutting lines below.
After cutting out the excess paper, go in and cut around closer to the body. One other hint (another teacher alert!!!)- keep readjusting the two papers after 3 or 4 cuts. Remember- keep repeating this lot!!!
When they are ready to glue, they place the black shadow first on to the center of green (or background) paper. The colored portrait is then placed next- below the shadow and to the left or right.
The last step is to create a border around the edge using scrap papers.
What do you think of these portraits? Would they work in your art class? You can leave a comment below.


No comments:
Post a Comment
Let me know what you think!